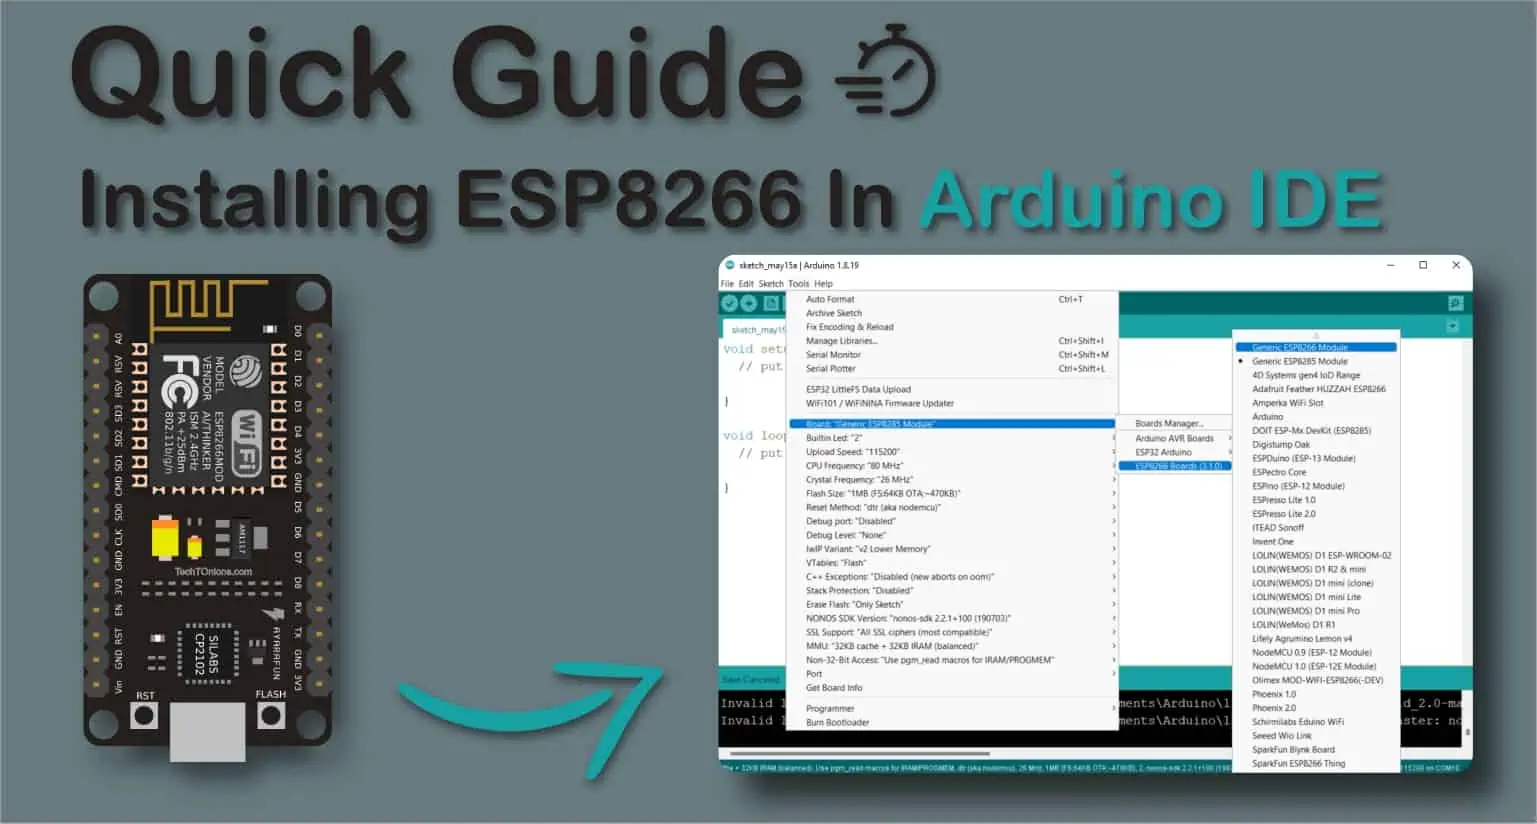
In this article, we will provide you with detailed step-by-step instructions to successfully install ESP8266 in the Arduino Integrated Development Environment (IDE). By following our guide, you’ll be able to seamlessly merge the power of Arduino with the versatility of ESP8266, unlocking a world of endless opportunities for your projects.
By integrating it with the Arduino IDE, you gain access to a powerful development environment and a vast library of code, making it easier to program and control your ESP8266 module. Let’s dive into the steps required to set up ESP8266 in Arduino IDE.
What is ESP8266?
The ESP8266 is a highly versatile and cost-effective Wi-Fi module widely used in IoT projects. It integrates a microcontroller and Wi-Fi capabilities, allowing devices to connect to the internet and communicate with other devices.
Its affordability, compact size, and extensive Wi-Fi capabilities make it an ideal choice for a wide range of projects, from home automation to sensor monitoring systems.
By installing ESP8266 in Arduino IDE, you can harness the power of both platforms and leverage the vast Arduino ecosystem, including its extensive library support and a large community of developers.
Install Arduino IDE
Before beginning this tutorial, you must have the Arduino IDE installed on your computer and a good internet connection. If you already have the newest Arduino IDE installed, you may skip this step. You can download Arduino IDE software from here.
You can also follow our simple guide on this:
Installing ESP8266 Board Package In Arduino IDE
After successfully installing the Arduino IDE, we need to add support for the ESP8266 board. Follow these steps:
-
Open the Arduino IDE and navigate to the “File” menu and Select “Preferences” from the drop-down menu. A new window will open

-
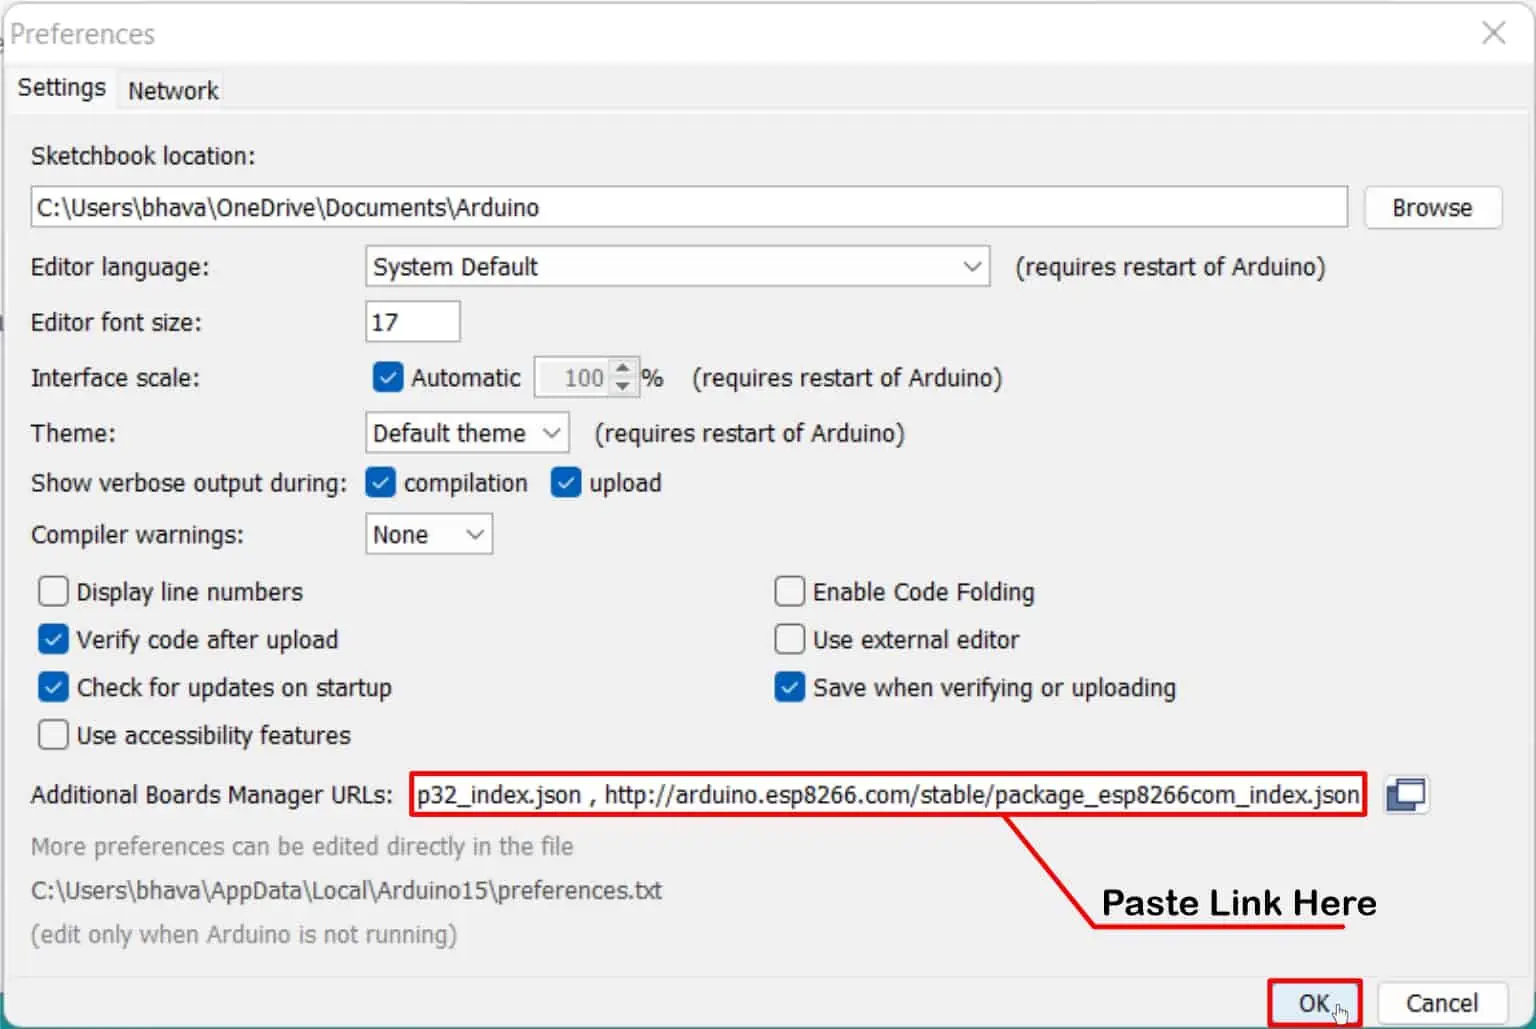
In the “Preferences” window, locate the “Additional Boards Manager URLs” field and click on the empty space next to it. Copy-paste the below URL from espressif in the Additional Boards Manager URLs:
http://arduino.esp8266.com/stable/package_esp8266com_index.jsonThen hit the OK button to save the settings.
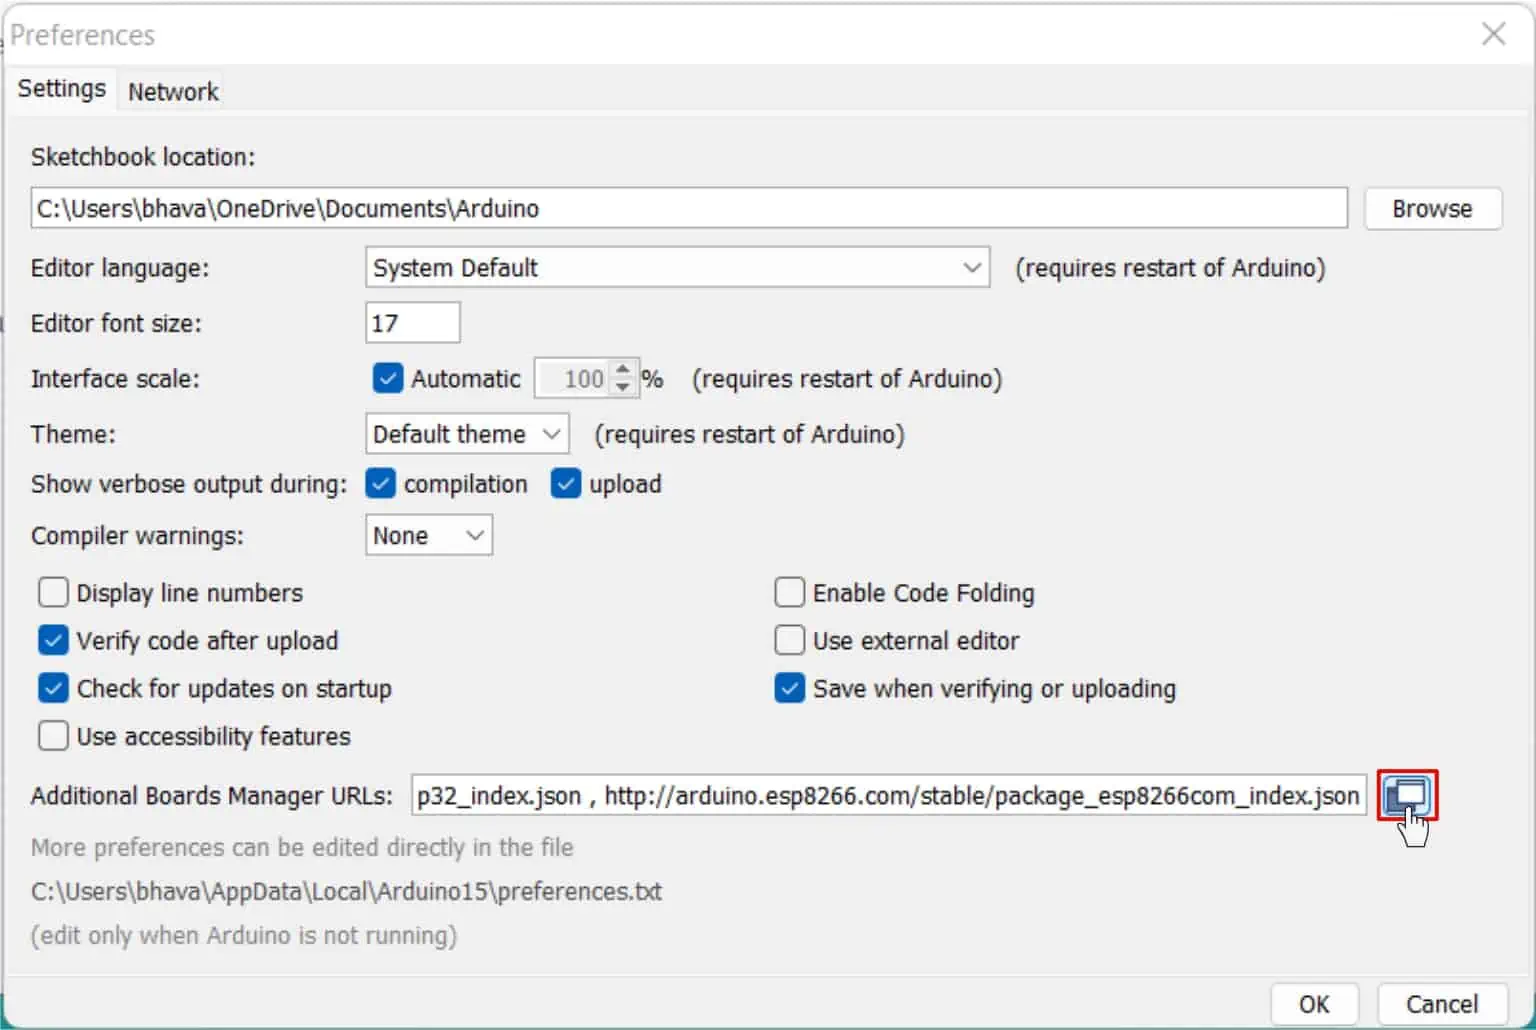
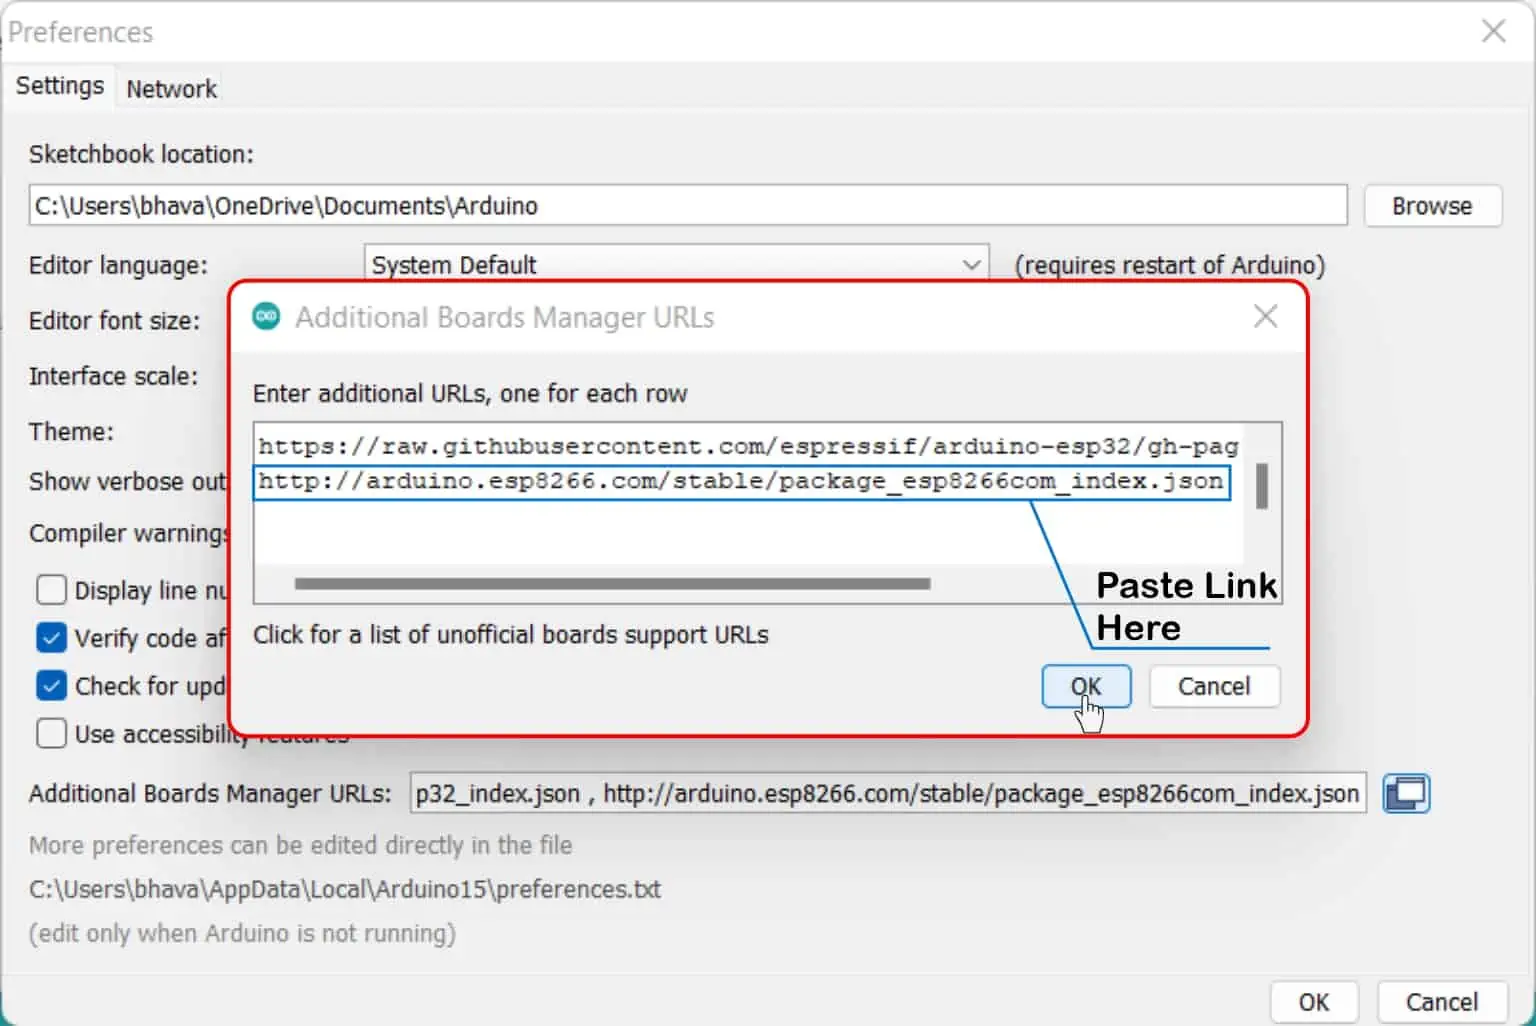
To view the Additional Boards Manager URLs: in Extended Window Follow the instructions as shown in the image below:

-
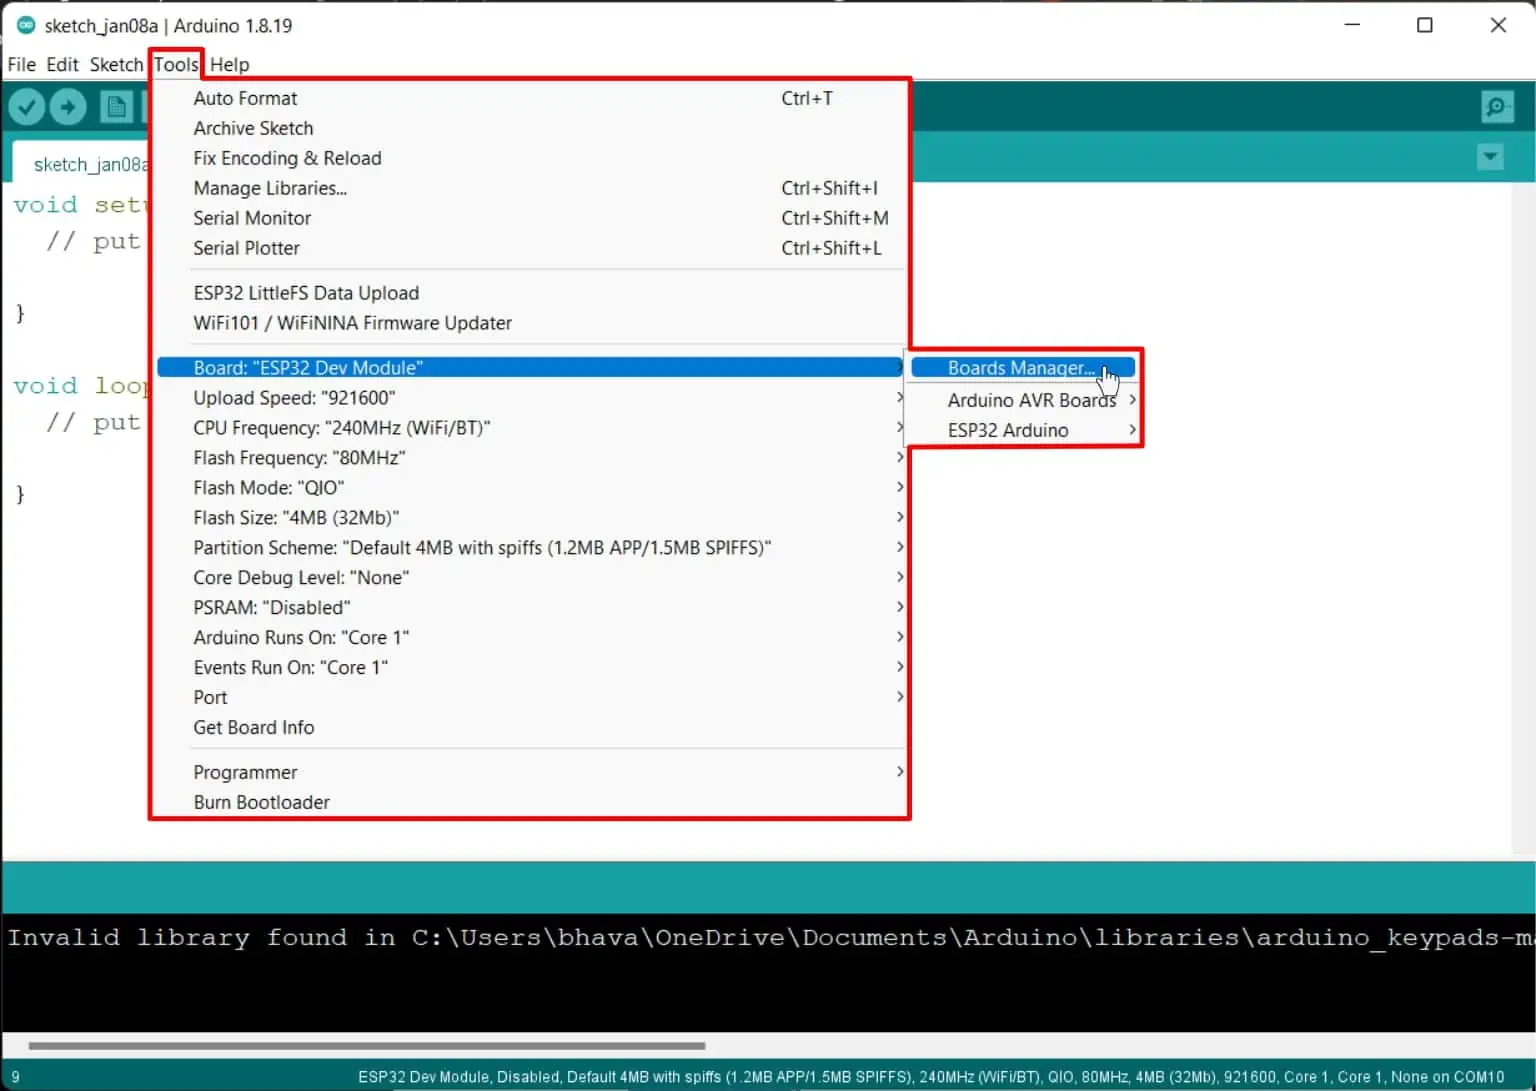
Opening the board manager. Go to Tools → Board → Boards Manager. It will open a new board manager window, and it will load all contents from the added URLs in step 2. Wait till this process completes.

-
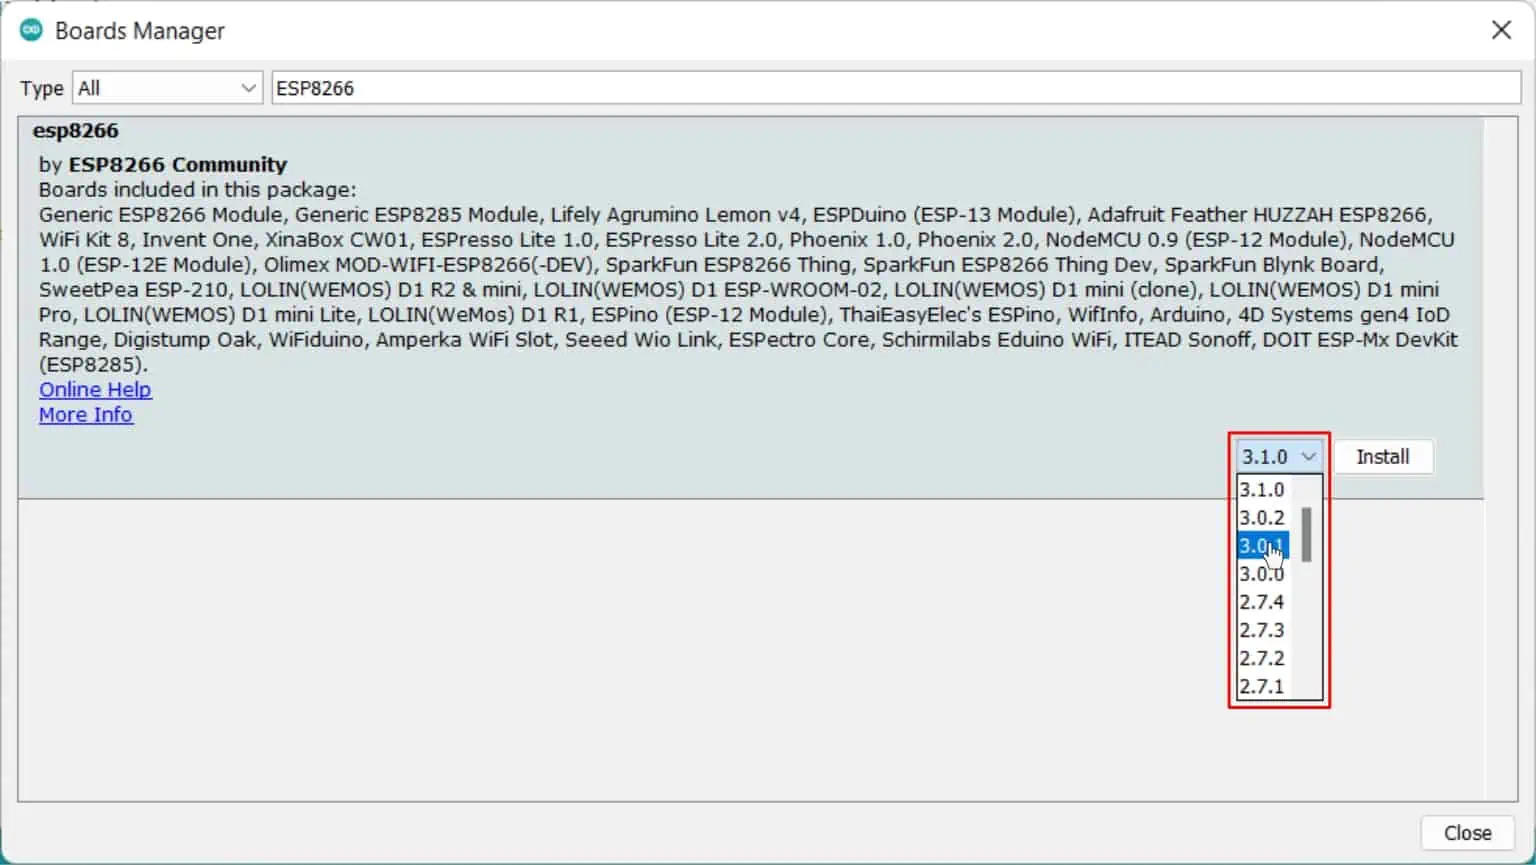
Search for ESP8266 in the search bar. You will see esp8266 by Espressif Systems; select it.
Select the appropriate version number from the right bottom corner. We recommend installing the latest version.
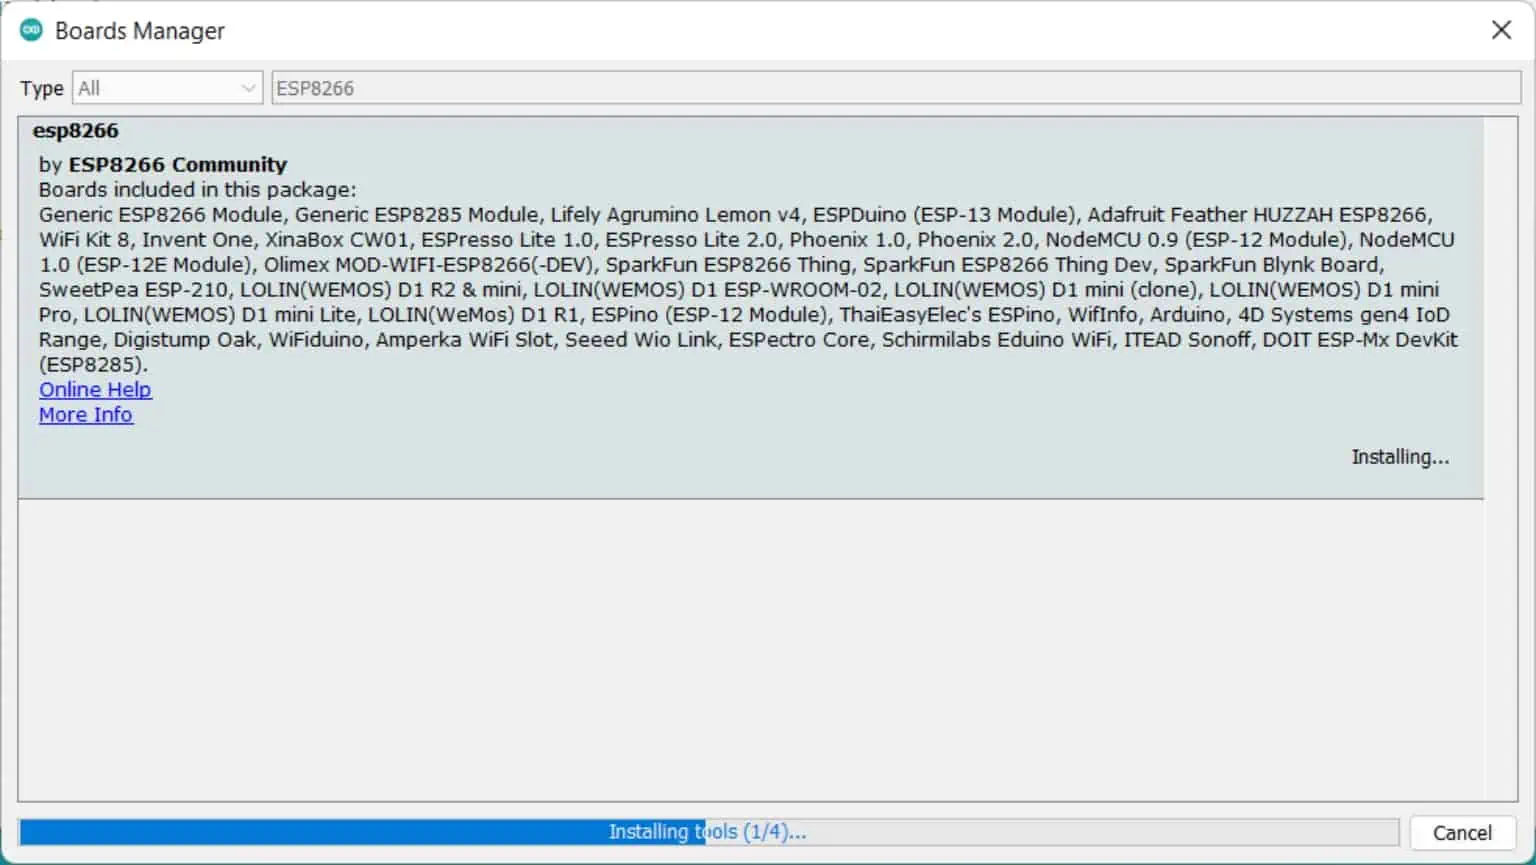
Hit the “Install” button to begin the installation process and wait. This may take a few moments.

-
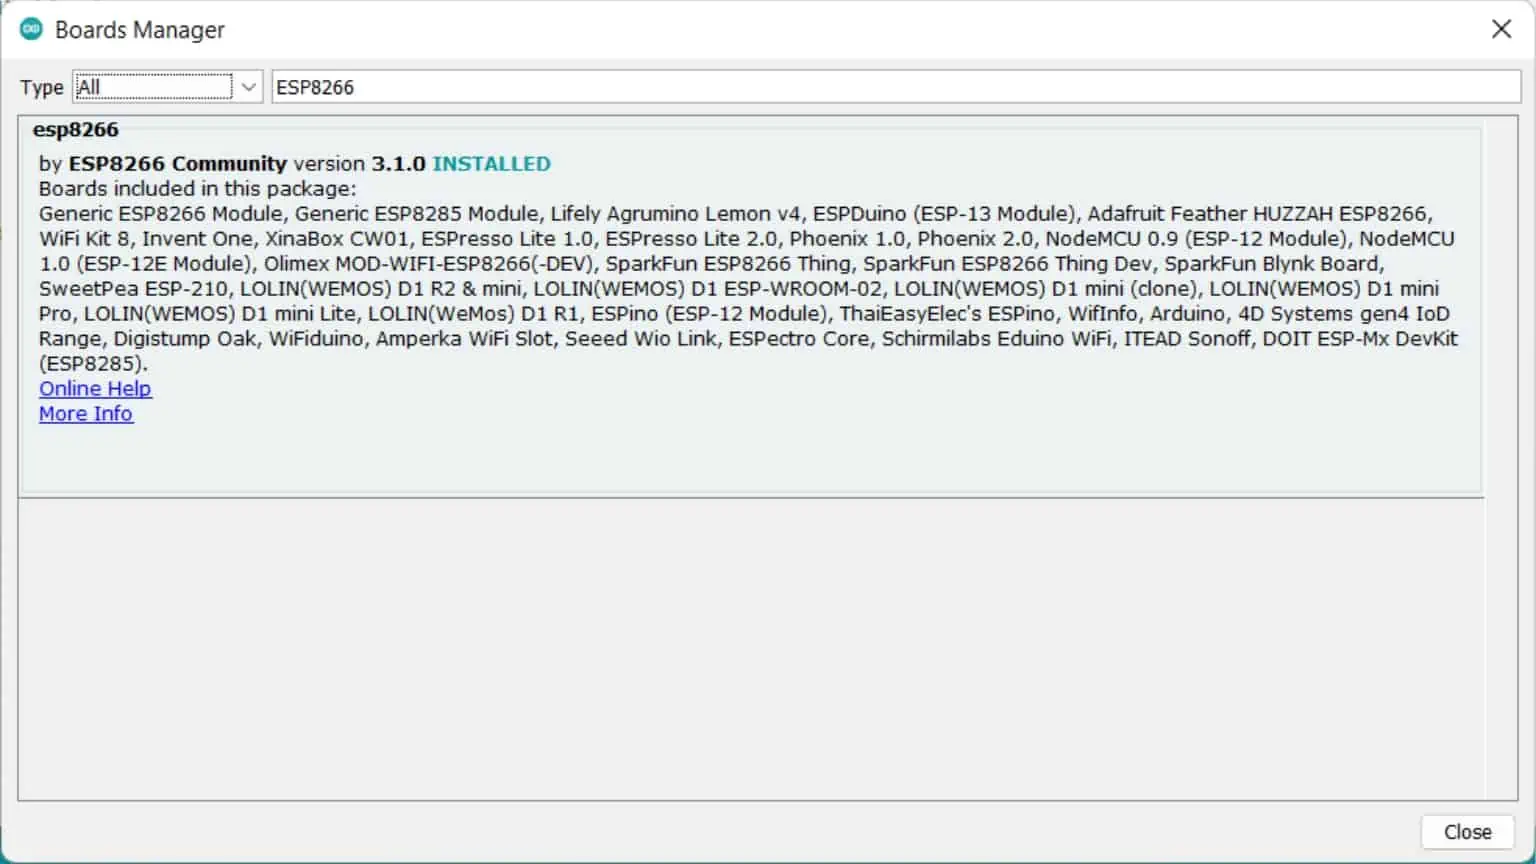
Congratulations! You have successfully Installed the ESP8266 board in Arduino IDE.

-
You can also confirm installation by going to Tools → Boards you will see ESP89266 Arduino category has been added now.
Note:- If you don’t see ESP8266 boards added then try restarting your Arduino IDE

Testing ESP8266 With Arduino IDE
We will test your ESP8266 board by programming an example sketch that comes with the ESP8266 package.
We will upload a WiFiScan example to test that everything is working perfectly on ESP8266 with Arduino IDE.
WiFiScan example, will scan all WiFi networks in the range of your ESP8266 and print their network SSID in the serial terminal. Additionally, it will also print the RSSI (signal strength) of the network.
Connect your ESP8266 board with a micro USB data cable to your computer and follow the instructions for uploading the example to ESP8266:
-
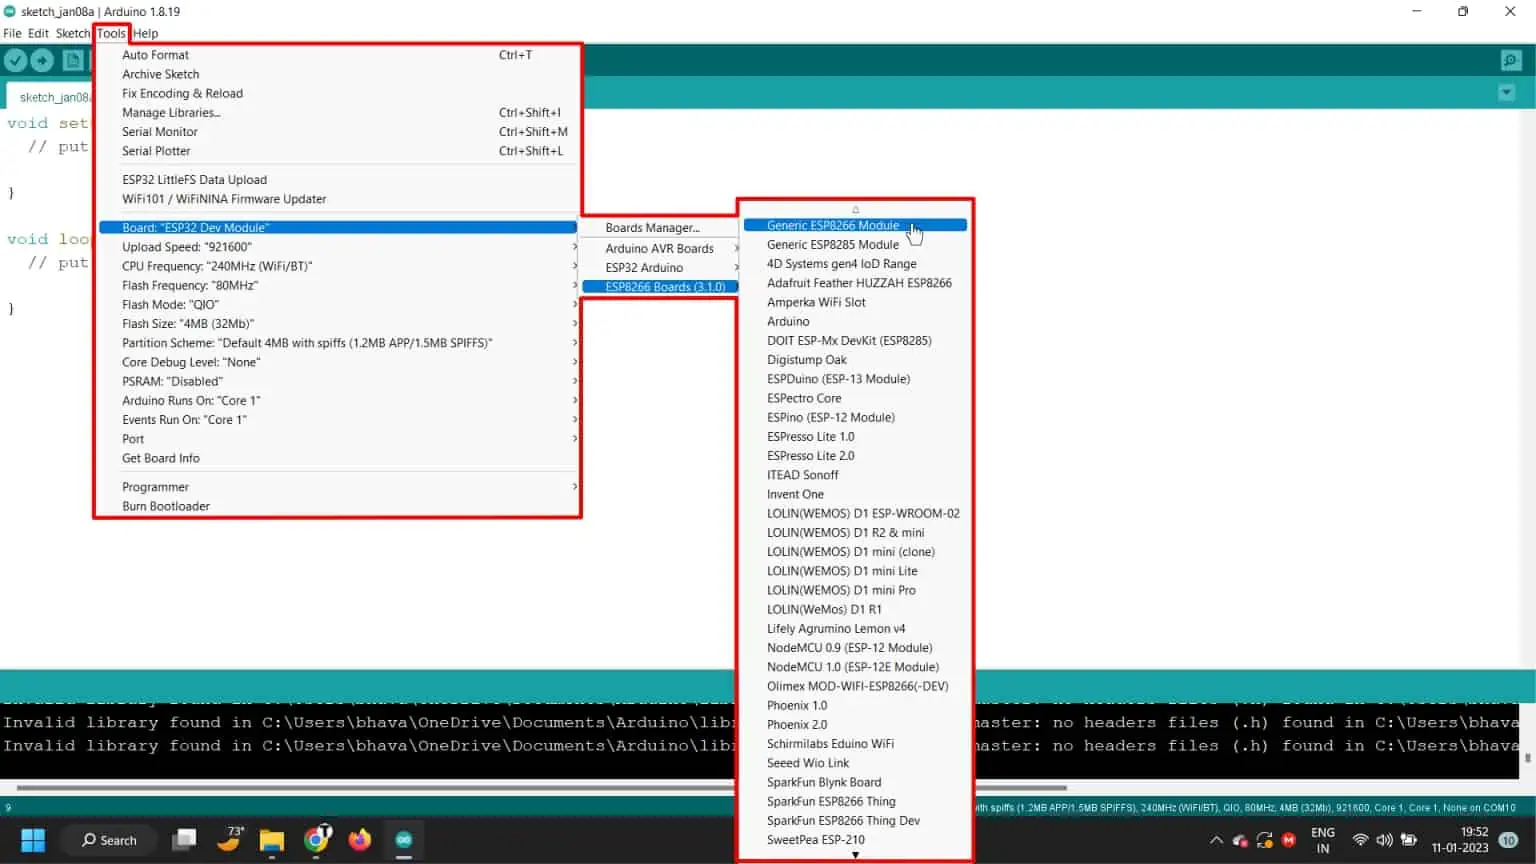
Selecting proper board. Go to Tools → Board → ESP8266 Boards → Generic ESP8266 Module. Leave all settings default.
-
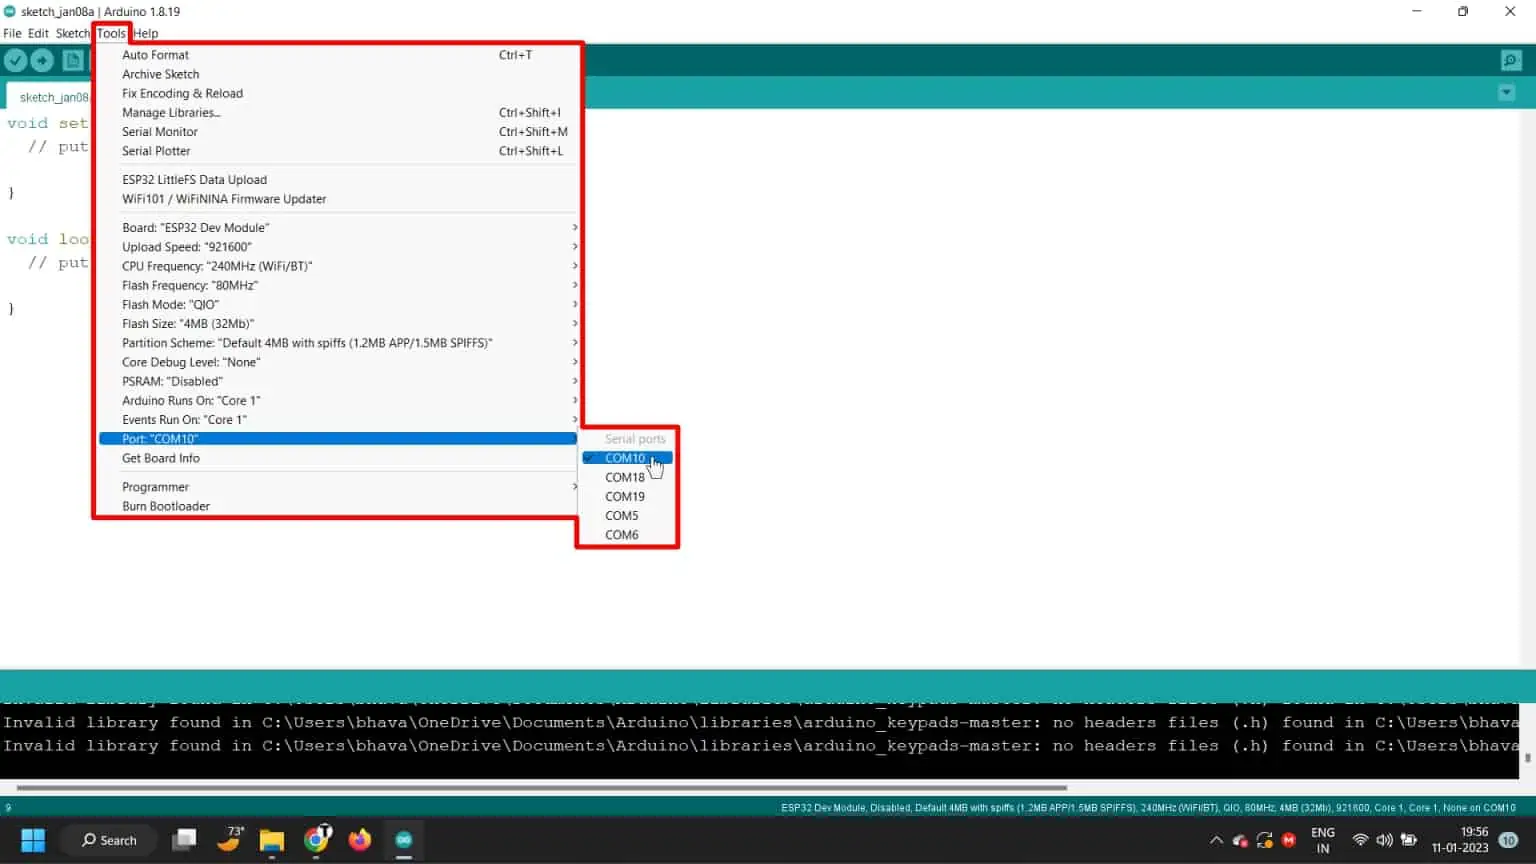
Selecting COM port. Go to Tools → Port → COM5 (select your ESP8266 com port; in our case, it’s COM10).
If the COM port is not shown on your computer, you need to install CP2102 virtual COM port drivers.
CP2102 is a USB to UART chip from Silicon labs used for converting USB data to UART data, and it is taking care of uploading program in our ESP8266 board. -
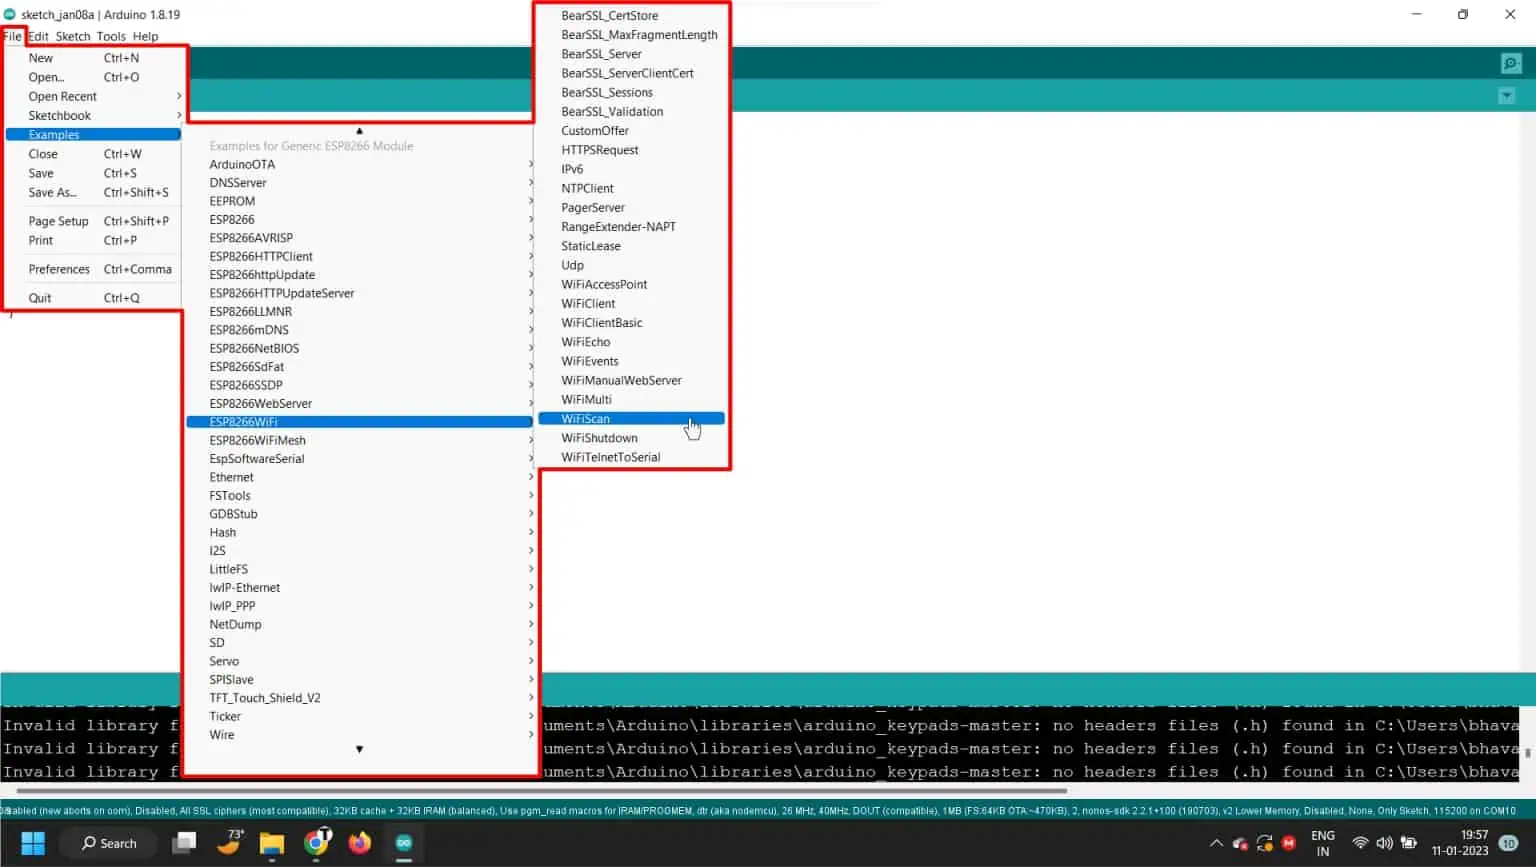
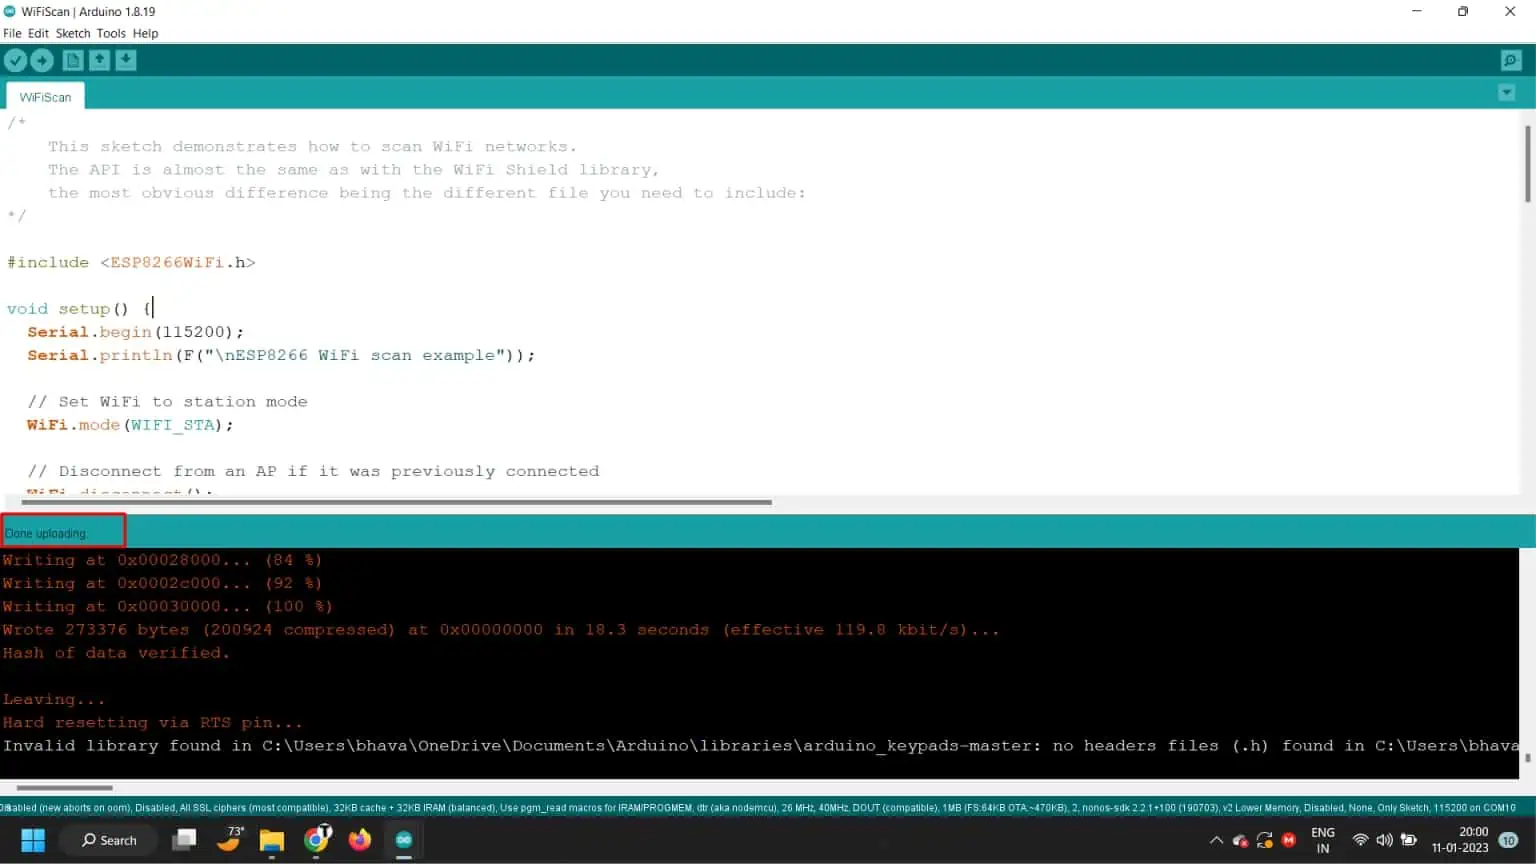
Opening the example. Go to File → Examples → WiFi (ESP8266) → WiFiScan A new Arduino project window will be opened named as WiFiScan.

-
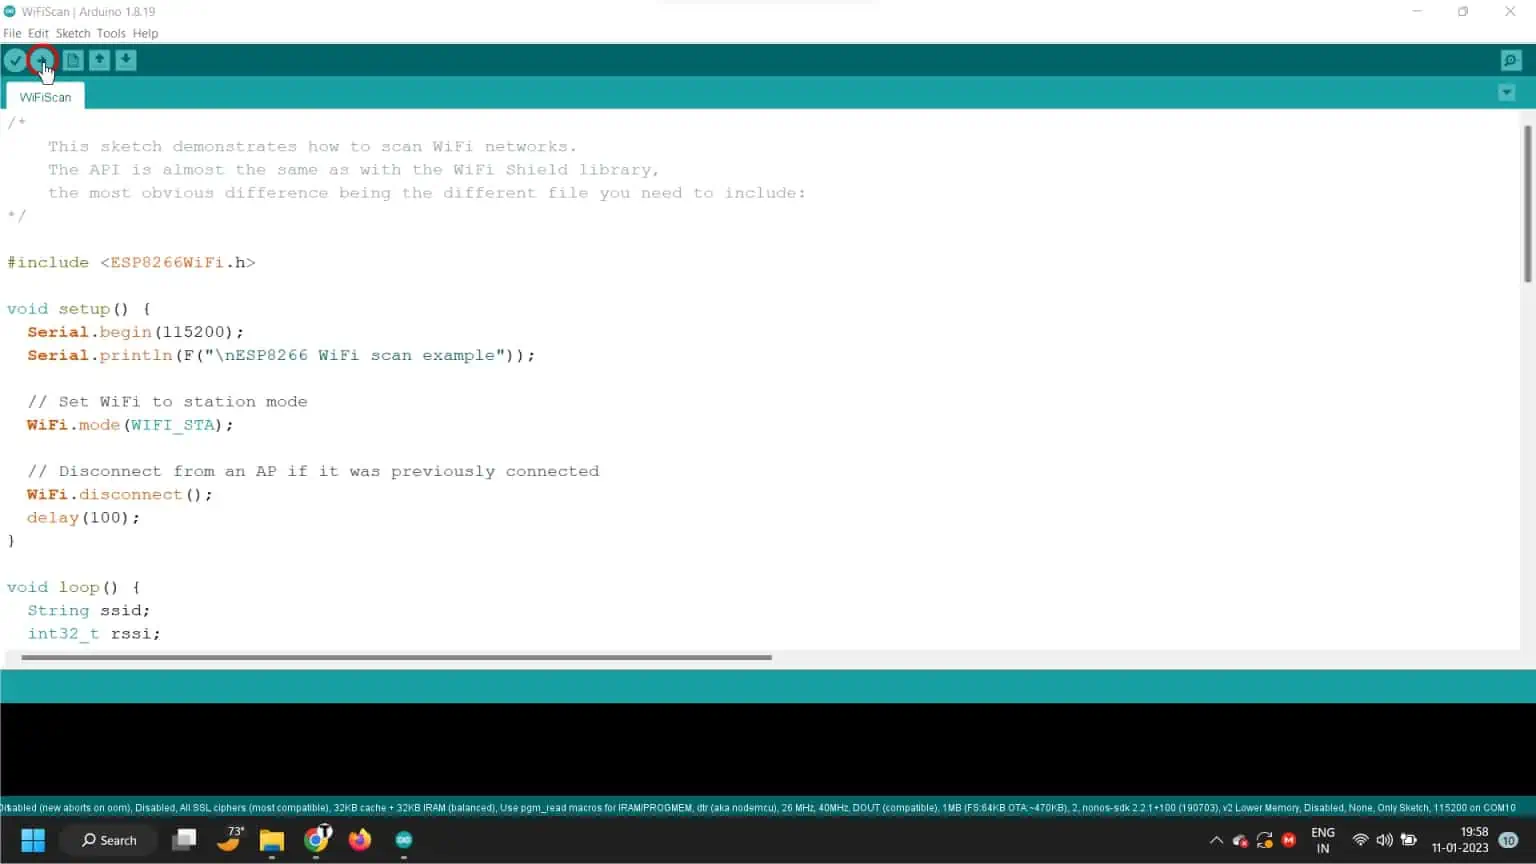
Press the upload button in Arduino IDE for uploading the example code in your ESP8266 board.
Now time to hold your breath for a while until the code is compiled and uploaded.

-
If all goes as per plan, you will see a Done uploading message.
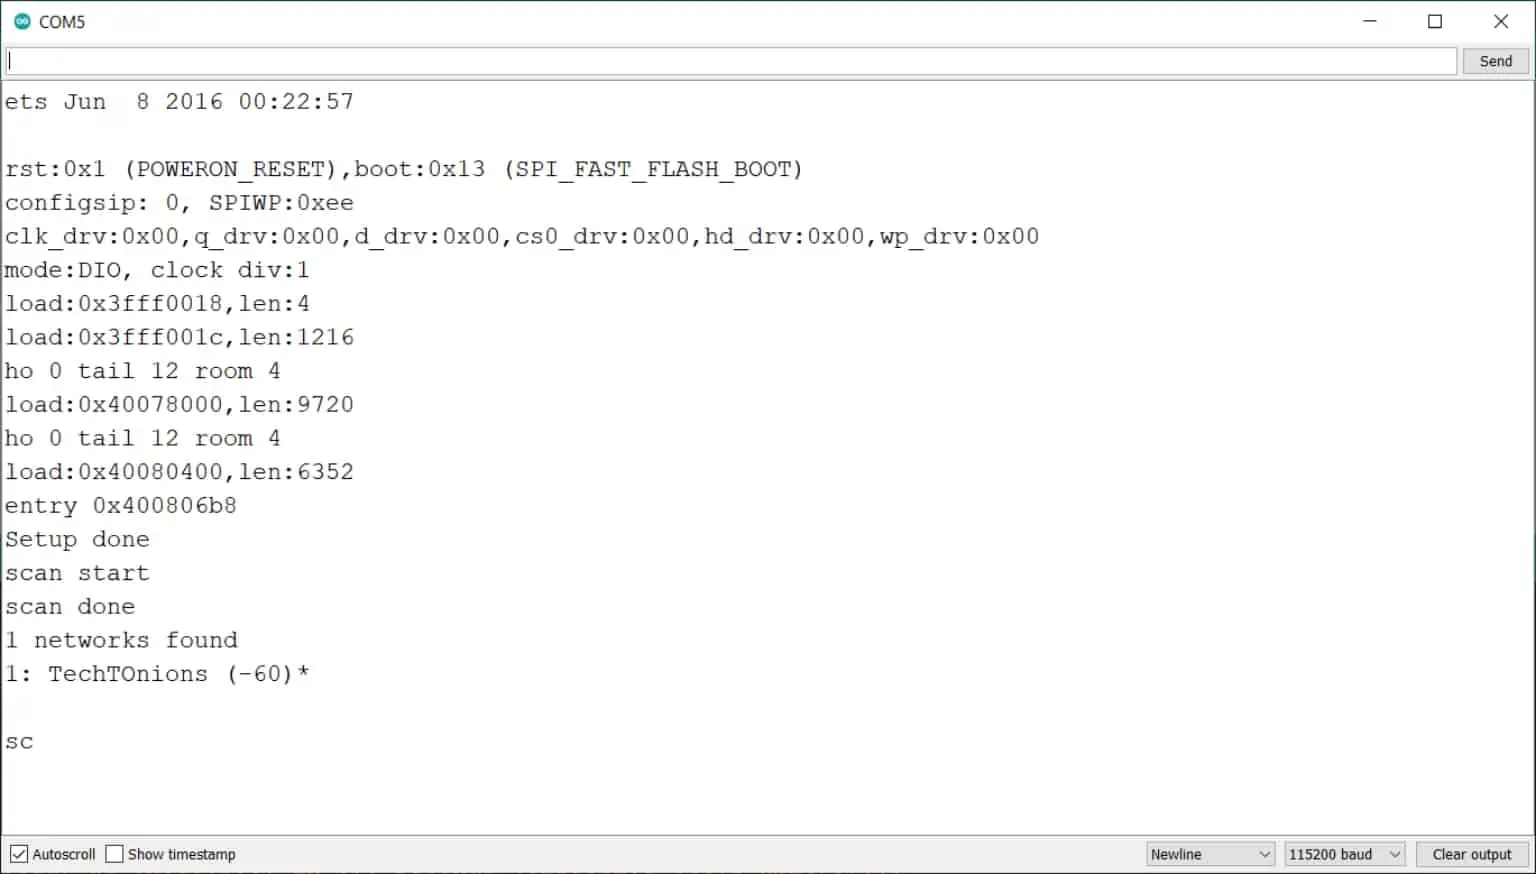
- Open the Serial Monitor in Arduino IDE. Set the baud rate to 115200 as this baud rate is defined in the Example code.
-
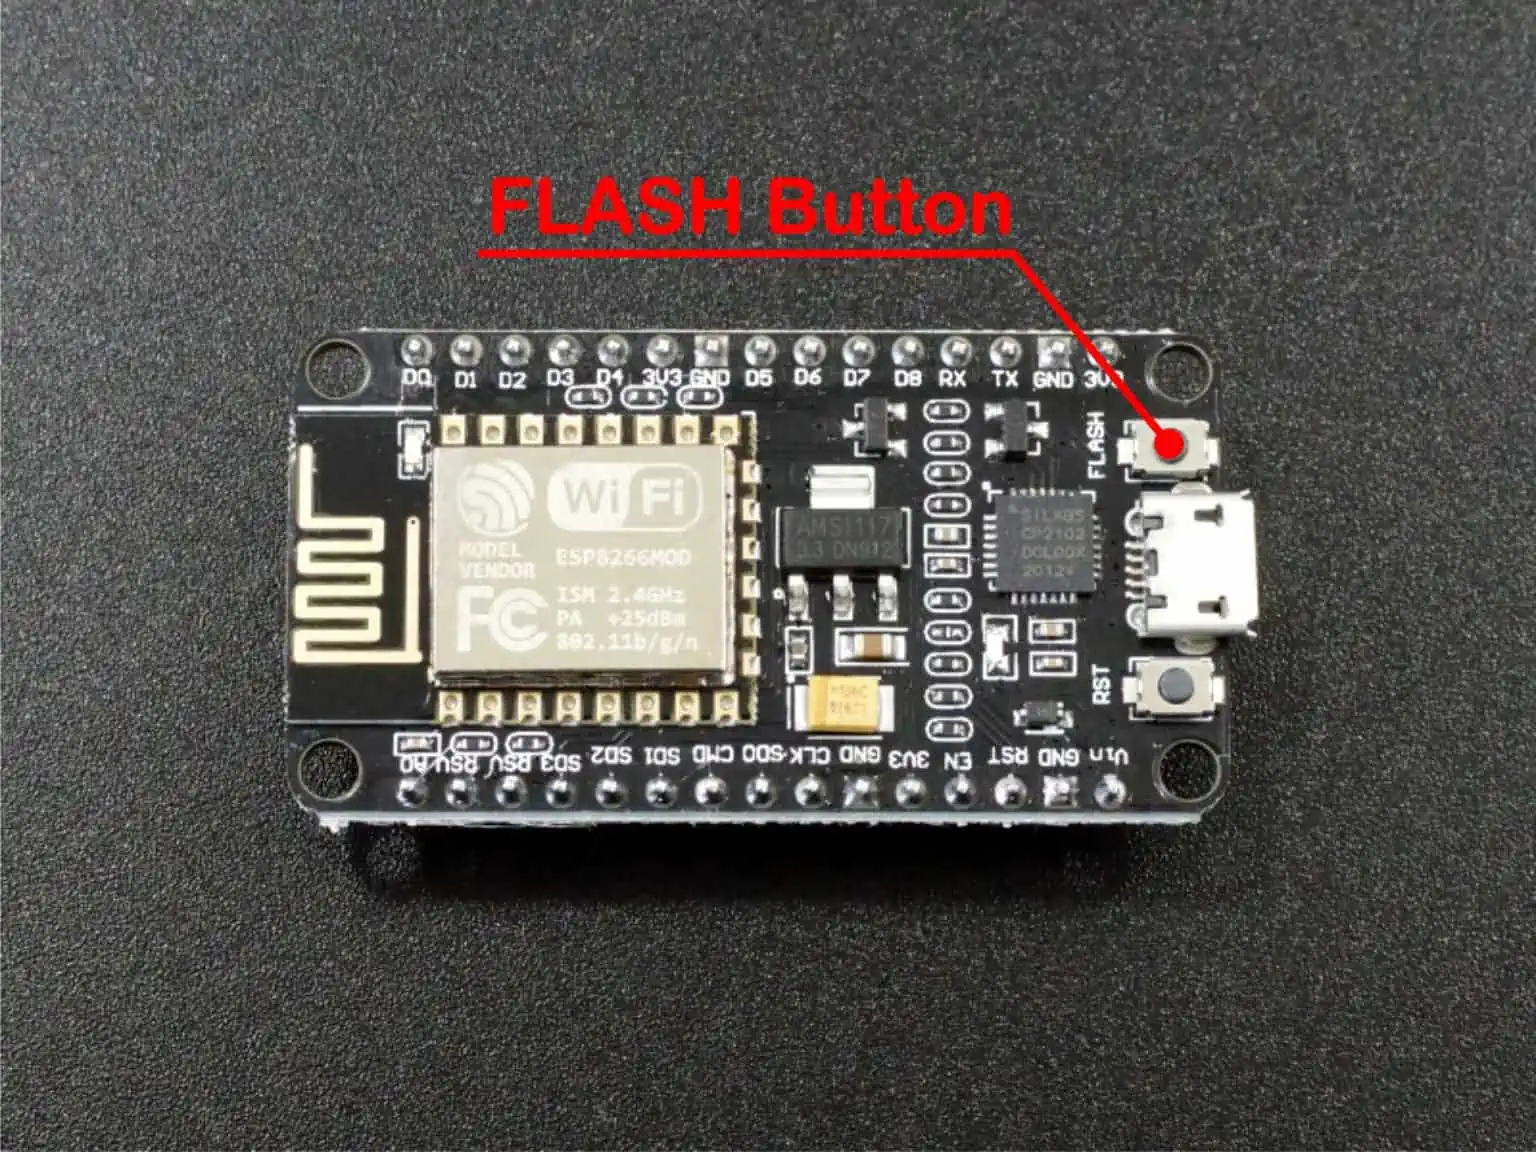
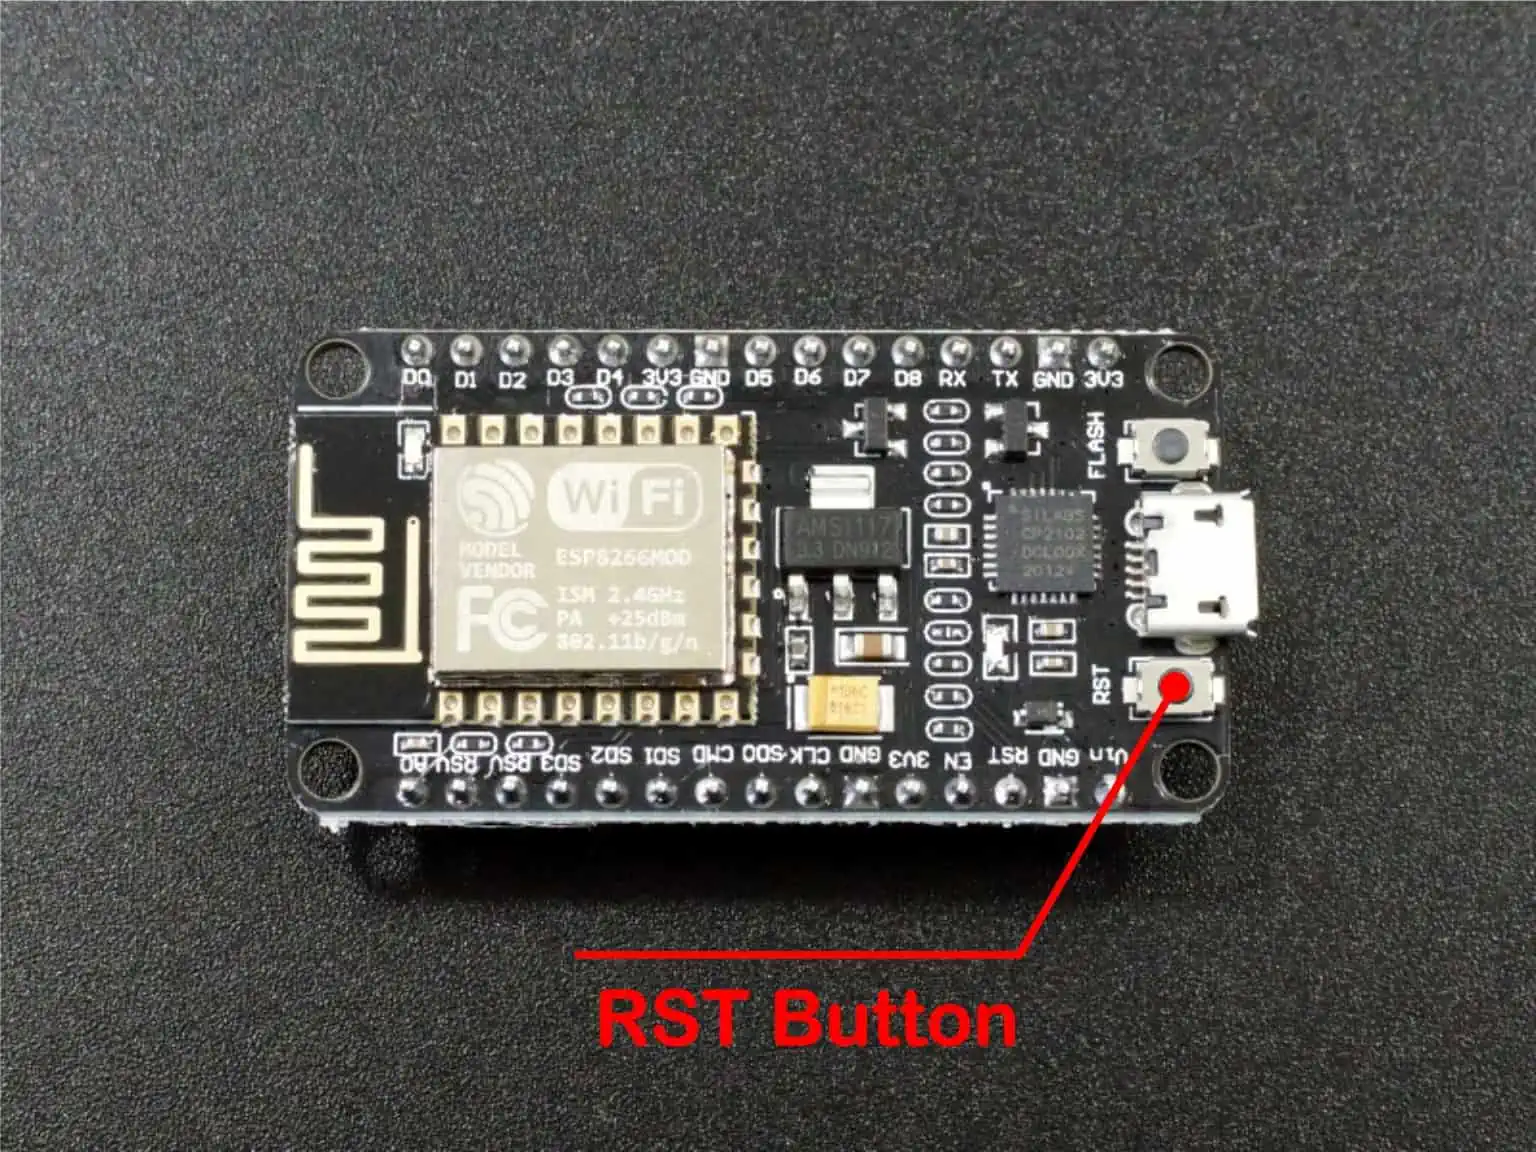
Now press the EN (Enable) / FLASH button on the ESP8266 board. It will reset the ESP8266, and our example code will start from the beginning.
Now ESP8266 will scan all available WiFi networks, and then it will print the list of their SSID name in the Serial Monitor.
Troubleshooting
Most commonly, you will end up in this error while uploading a new sketch to your ESP8266 and you get this error message “esptool.FatalError: Failed to connect to ESP8266: Timed out waiting for packet header“. It means that your ESP8266 is not in flashing/uploading mode.

This error is caused because your ESP8266 board is not entering into bootloader mode. Mostly we have phased this problem into cheap Chinese boards of ESP8266.
Solution:
Follow the steps to encounter this error:
- Select the right COM port and board name.
- Press the upload button in Arduino IDE.
-
When your code starts compiling, hold down the BOOT / FLASH button on ESP8266

-
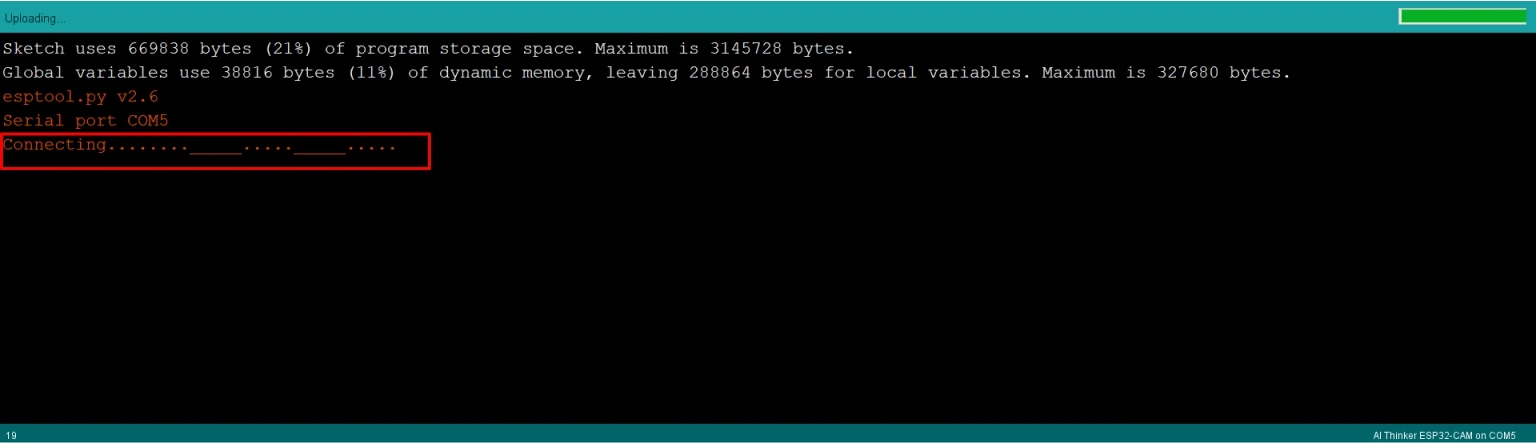
When compiling is finished, you will see the Connecting……. message in Arduino IDE, Now you have to release the BOOT button.
If it works, you will see the uploading process started, and some numbers in percentages will be printed.
If you see the same pattern in Arduino IDE, Try holding the BOOT button again for a while and release it.
Note:- Timing is important for this; It may require few tweaks and little practice to solve this.
- After that, you will see the Done uploading message in Arduino IDE.
Now you can press the ESP8266 onboard ENABLE / RST button to restart the uploaded ESP8266 code.
Note:- You will need to follow the same button sequence every time you start uploading your code.
Conclusion
We have learned how to start programming ESP8266 boards using Arduino IDE. The process had become very simple compared to the initial days when espressif had started integrating ESP8266 with the Arduino environment.
Now it’s time for building new projects based on ESP8266.


Thank you very much for this tutorial.